
Why Your Concealer Creases Under Your Eyes (and the Prep Step That Fixes It)
Concealer creases when the under-eye area is dry, un-prepped, or over-powdered. Hydrating prep and thin layers prevent creasing.
Published
Marcus Vance
Fabric Longevity & Grooming Editor · Editor Bio → · How we research →
Our comprehensive library of ingredient breakdowns, product tests, and barrier protocols.
Key Takeaways
- Concealer creases when the under-eye area is dry, un-prepped, or over-powdered.
- Dry skin under the eyes catches concealer and makes it settle into fine lines.
- Hydrating prep (eye cream, primer) creates a smooth base.
- Thin layers and a damp sponge prevent creasing.
- Setting with a light dusting of powder locks concealer in place.
You apply concealer. It looks perfect. An hour later, it has creased. It has settled into fine lines under your eyes. You add more concealer. It looks worse. The problem is not the concealer. It is the prep.
This guide explains why concealer creases, what causes it, and how to fix it.
What Creasing Is
Creasing is when concealer settles into fine lines under the eyes. The product moves from the smooth skin surface into the lines. This creates visible lines of product that look worse than no concealer at all.
Creasing is different from fading. Fading is when the color wears off evenly. Creasing is when the product moves and clumps in lines.
Cause One: Dry Under-Eye Skin
Dry skin under the eyes is the most common cause of creasing. The skin around the eyes is the thinnest on the body. It is also the driest. It has few oil glands.
Dry skin has texture and flakes. Concealer catches on these flakes and settles into lines. The drier the skin, the worse the creasing.
The fix is to hydrate the under-eye area before applying concealer. Use an eye cream or a hydrating serum. Apply it and wait 5 minutes for absorption. Blot off excess before applying concealer.
If your under-eye area is very dry, use a hydrating primer. This creates a smooth base that concealer can blend into.
Cause Two: Not Prepping the Under-Eye Area
Skipping eye cream or primer causes creasing. The under-eye area has no smooth base. Concealer catches on texture and settles into lines.
The correct prep is.
- Apply eye cream. Wait 5 minutes.
- Blot off excess eye cream.
- Apply a thin layer of primer (optional but helpful).
- Wait 2 minutes.
- Apply concealer.
If you skip steps, the concealer has no smooth base. It creases within minutes.
Cause Three: Too Much Product
Applying too much concealer causes creasing. The under-eye area can only hold so much product. Excess concealer sits on the surface and settles into lines.
Use a small amount. One dot under each eye is enough. Apply in thin layers. Build coverage only where needed (under the eyes, on dark circles).
Do not apply concealer to the entire under-eye area. Focus on the dark circles and the inner corner. Less product means less creasing.
Cause Four: Wrong Formula
Some concealer formulas are more prone to creasing.
- Creamy, hydrating concealers: less likely to crease. Good for dry skin.
- Matte, full-coverage concealers: more likely to crease. They dry down and settle into lines.
- Liquid concealers: moderate creasing risk. Depends on the formula.
- Stick concealers: highest creasing risk. They are thick and heavy.
If your concealer creases, switch to a creamy, hydrating formula. Avoid matte and stick concealers for the under-eye area.
Cause Five: Not Setting
Concealer that is not set creases. The product moves and settles into lines. Setting with powder locks it in place.
Set the under-eye area with a light dusting of translucent powder. Use a small, fluffy brush. Press (do not drag) the powder into the skin.
Do not over-powder. Too much powder makes the under-eye area look dry and cakey. A light dusting is enough.
Cause Six: Applying Too Close to the Lash Line
Applying concealer too close to the lower lash line causes creasing. The product gets into the fine lines near the lashes. It also transfers to the lashes and causes smudging.
Apply concealer below the dark circles, not up to the lash line. Leave a small gap between the concealer and the lower lashes. This prevents creasing and smudging.
Cause Seven: Not Blending Properly
Rubbing concealer into the skin creates streaks and texture. The product does not blend evenly. It sits on top and creases.
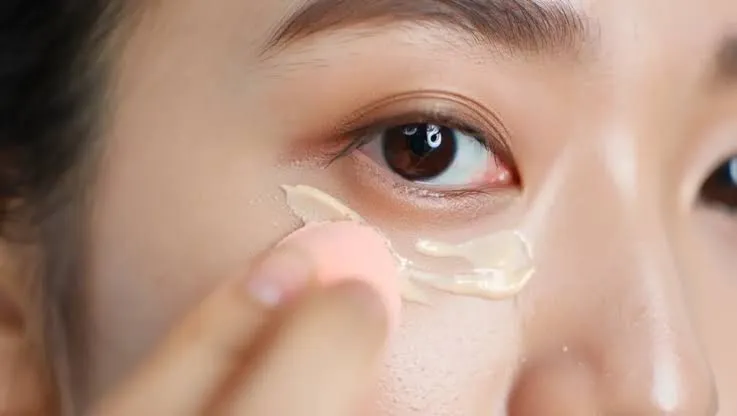
Apply concealer with a damp sponge or a small, dense brush. Stipple (press) rather than drag. This presses the product into the skin.
Do not over-blend. Over-blending breaks the concealer apart and creates texture. Apply, blend the edges, and stop.
The Right Application Routine
- Apply eye cream. Wait 5 minutes. Blot off excess.
- Apply primer (optional). Wait 2 minutes.
- Apply concealer in thin layers. Use a damp sponge or small brush. Focus on dark circles.
- Blend the edges. Do not over-blend.
- Set with a light dusting of translucent powder. Press, do not drag.
- Finish with setting spray.
The Damp Sponge Trick
A damp sponge is the best tool for preventing creasing. The moisture in the sponge blends the concealer into the skin. It creates a seamless, natural finish.
Wet the sponge. Squeeze out excess water. The sponge should be damp, not dripping. Use it to stipple (press) concealer into the skin.
Do not use a dry sponge or brush for crease-prone under-eyes. Dry tools apply product on top of the skin. Damp tools blend it in.
The Baking Method
Baking is a technique that sets concealer with a thick layer of powder. It prevents creasing for hours.
- Apply concealer.
- Apply a thick layer of translucent powder over the concealer.
- Wait 5 to 10 minutes.
- Dust off the excess powder.
Baking works well for long-lasting makeup. But it can look dry and cakey. Use it sparingly. Only bake for special occasions or long days.
Common Mistakes That Make It Worse
- Skipping eye cream. Always hydrate first.
- Applying too much concealer. Thin layers only.
- Using a matte formula. Switch to creamy.
- Not setting with powder. Powder locks the concealer in place.
- Applying too close to the lash line. Leave a gap.
- Rubbing instead of stippling. Press, do not drag.
- Over-powdering. Light dusting only.
When to See a Makeup Artist
See a makeup artist if you cannot find a concealer that works. See one if you want to learn proper application technique. See one if you have a special event and want flawless under-eyes.
A good makeup artist will assess your skin type and recommend products and techniques.
Frequently Asked Questions
Why does my concealer crease after 1 hour?
The under-eye area is dry or un-prepped. Hydrate with eye cream. Apply in thin layers with a damp sponge. Set with powder.
Can I fix creased concealer without removing it?
Yes. Spray a facial mist on the under-eye area. Then use a damp sponge to press the concealer back into the skin. This re-blends the product and removes the creases.
Does concealer formula matter?
Yes. Creamy, hydrating concealers crease less. Matte, full-coverage concealers crease more. Choose a creamy formula for the under-eye area.
How do I prevent creasing with age?
As you age, fine lines deepen. Creasing becomes more likely. Use a hydrating eye cream. Apply concealer in thin layers. Set with powder. Use a damp sponge. Consider a hydrating, luminous formula.
Concealer creasing is a prep and application problem. Hydrate the under-eye area. Apply in thin layers with a damp sponge. Set with powder. The concealer stays smooth and natural.