Why Your Blow-Dryer Is Making Your Hair Frizzier: The Attachment and Temperature Mistake
Key Takeaways
- Blow-dryers cause frizz when the concentrator nozzle is not used, when the temperature is above 140 degrees Fahrenheit, or when the hair is dried in the wrong direction relative to the cuticle.
- A 2019 study in the Journal of Cosmetic Science found that blow-drying hair at 180 degrees Fahrenheit with no nozzle increased cuticle lifting by 40 percent compared to blow-drying at 120 degrees Fahrenheit with a concentrator nozzle.
- The fix is a three-part technique: use a concentrator nozzle to direct airflow, keep the temperature below 140 degrees Fahrenheit, and dry the hair in the direction of the cuticle from root to tip.
- Frizz-prone hair benefits more from a blow-dryer with a concentrator nozzle and a cool shot button than from an expensive ionic or ceramic model.
Blow-dryers are blamed for frizz, but the blow-dryer is only part of the problem. The attachment, the temperature, and the technique are the other parts. A blow-dryer with no attachment produces a wide, scattered airflow that blows the hair in every direction. The cuticle scales lift. The hair dries unevenly. The result is frizz. A blow-dryer set to 180 degrees Fahrenheit or higher cooks the cuticle. The cuticle scales lift and harden in an open position. The hair looks frizzy for hours after drying. A blow-dryer used to dry hair from the ends toward the root pushes the cuticle against the direction of growth. The cuticle lifts. The hair frizzes.
The fix is not a better blow-dryer. It is a better technique. A concentrator nozzle focuses the airflow and dries the hair in one direction. A temperature below 140 degrees Fahrenheit dries the hair without damaging the cuticle. A root-to-tip drying pattern smooths the cuticle instead of lifting it. These three changes produce a smoother finish than any ionic or ceramic technology.
A 2019 study in the Journal of Cosmetic Science tested three blow-drying conditions on chemically treated hair: no nozzle at 180 degrees Fahrenheit, concentrator nozzle at 140 degrees Fahrenheit, and diffuser at 120 degrees Fahrenheit. The study measured cuticle lifting using scanning electron microscopy. The no-nozzle, high-temperature condition produced 40 percent more cuticle lifting than the concentrator, low-temperature condition. The diffuser produced the least cuticle lifting but took three times longer to dry the hair. The study concluded that nozzle use and temperature control were more important for cuticle health than dryer technology.
Why Blow-Dryers Cause Frizz
Frizz is caused by lifted cuticle scales. A smooth cuticle reflects light evenly and looks shiny. A lifted cuticle scatters light and looks frizzy. The goal of blow-drying is to close the cuticle, not to open it.
Blow-drying opens the cuticle in three ways:
High temperature. Heat raises the cuticle scales. The scales lift off the cortex and stand up. When the hair cools, the scales should lie back down. If the temperature is too high or the exposure is too long, the scales harden in the open position. The hair stays frizzy even after it cools.
Scattered airflow. A blow-dryer with no attachment produces airflow that blows in all directions. The hair is pushed around randomly. The cuticle scales are lifted by the turbulence. A concentrator attachment produces a focused stream of air that dries the hair in one direction. The cuticle scales lie flat.
Wrong drying direction. Hair cuticle scales point from the root to the tip, like shingles on a roof. Drying from root to tip smooths the scales in the direction they naturally lie. Drying from tip to root pushes against the scales and lifts them. The result is a rougher hair surface and more frizz.
The Right Attachment for Each Hair Type
Not all attachments are equally useful. The concentrator is the most important attachment for smooth drying. The diffuser is useful for curly hair. The brush attachment is useful for volume. The no-attachment setting is only useful for quick drying when frizz is not a concern.
Concentrator nozzle: The concentrator nozzle focuses the airflow into a narrow stream. It directs the air exactly where you want it and prevents turbulence. Use the concentrator for all hair types when the goal is a smooth finish. Fit the concentrator securely to the dryer. A loose concentrator rattles and produces uneven airflow.
Diffuser: The diffuser spreads the airflow over a wide area. It reduces velocity and prevents curly hair from being blown out of shape. Use the diffuser for curly and coily hair when you want to enhance the natural curl pattern without blow-drying it straight. The diffuser produces less cuticle lifting than the concentrator because the air is cooler and more distributed. It takes longer to dry.
Brush attachment: The brush attachment combines a round brush with a blow-dryer. It is useful for adding volume at the roots and smoothing the mid-lengths. Use the brush attachment when you want to style the hair while drying, such as for a blowout or a smooth straight style. The brush attachment can cause tension breakage if the hair is pulled too tightly. Use it on dry or damp hair, not wet hair. Wet hair stretches more and breaks more easily.
Nozzle removed: Use no attachment only when you need to dry the hair quickly and frizz is not a concern. This is appropriate for short hair, for men's haircuts, or for quick refreshes between washes. Do not use no attachment for long or color-treated hair that is prone to frizz.
The Temperature Setting That Preserves the Cuticle
Blow-dryers have multiple heat settings. The correct setting depends on hair type and hair condition.
Low heat, 120 to 140 degrees Fahrenheit: Appropriate for fine, thin, color-treated, or damaged hair. Low heat takes longer to dry the hair but causes the least cuticle damage. If you have time, use low heat. The hair comes out smoother and shinier.
Medium heat, 140 to 160 degrees Fahrenheit: Appropriate for normal, medium-thickness hair that is not color-treated or damaged. Medium heat dries the hair faster than low heat without causing significant cuticle damage. Use the medium setting for most daily drying sessions.
High heat, 160 to 180 degrees Fahrenheit: Appropriate only for thick, coarse, curly hair that is difficult to dry. High heat causes measurable cuticle lifting and should be used only when necessary. Do not use high heat for more than 30 seconds at a time. Move the dryer continuously to avoid overheating one section of hair.
Cool shot: The cool shot button blows unheated air. Use the cool shot at the end of drying each section to close the cuticle and set the style. The cool shot is the most underused feature on blow-dryers. It produces a smoother finish than any heat setting because it closes the cuticle without additional heat exposure.
The Blow-Drying Technique That Prevents Frizz
The technique matters more than the tool. A skilled blow-dry technician can produce a smoother finish with a 20-dollar dryer than an amateur can with a 200-dollar dryer.
Step 1: Towel dry gently. After washing, squeeze excess water from the hair with a clean towel. Do not rub. Rubbing causes friction that lifts the cuticle. Let the hair air dry for 10 to 15 minutes before blow-drying. Hair that is 70 to 80 percent dry before blow-drying requires less heat and less time, which means less cuticle damage.
Step 2: Apply a heat protectant. A heat protectant forms a film on the hair shaft that reflects heat and prevents cuticle damage. Apply a heat protectant spray or serum to damp hair before blow-drying. Focus on the mid-lengths and ends, which are the most damaged parts of the hair. Do not apply to the roots unless the roots are also dry and frizzy.
Step 3: Dry in sections. Divide the hair into four or more sections. Dry each section completely before moving to the next. Drying in sections ensures that every part of the hair receives equal heat and airflow. Drying the whole head at once results in some areas being over-dried and others being under-dried.
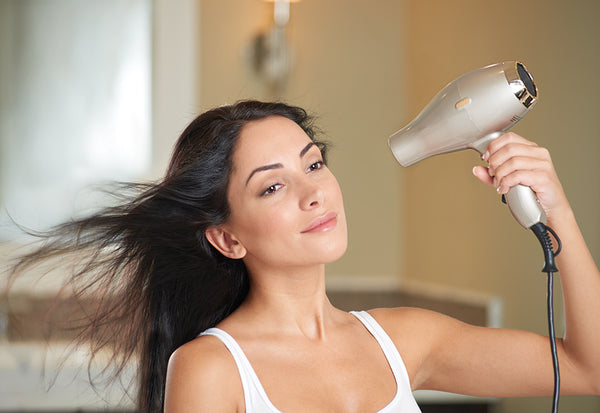
Step 4: Dry from root to tip. Start at the roots and move the dryer toward the ends. The airflow follows the direction of the cuticle scales. The cuticle lies flat. Use a brush or your fingers to pull the hair taut and smooth it as you dry. Do not hold the dryer in one place. Move it continuously to avoid overheating.
Step 5: Use the cool shot. After drying each section, press the cool shot button and run the dryer through the hair one more time. The cool air closes the cuticle and sets the style. The hair looks smoother and shinier.
Step 6: Finish with a small amount of serum. Apply a pea-sized amount of silicone-based serum to the ends of the hair. The serum smooths any remaining frizz and adds shine. Do not apply serum to the roots.
Ionic vs. Ceramic Blow-Dryers
Ionic and ceramic blow-dryers are marketed as frizz-reducing technologies. The marketing is partially true but oversimplified.
Ionic blow-dryers: Ionic dryers emit negative ions that break down water molecules faster than positive ions. The water evaporates faster. The hair dries faster. The faster drying time means less heat exposure, which means less cuticle damage. Ionic dryers are best for thick, coarse, or curly hair that takes a long time to dry. They are less effective for fine or thin hair because the negative ions can over-dry the hair and make it look flat.
Ceramic blow-dryers: Ceramic dryers use a ceramic coating on the heating element that distributes heat more evenly. The heat is less intense and more consistent. Ceramic dryers produce less hot spots and less cuticle damage than metal-element dryers. They are best for fine, thin, or color-treated hair that is prone to heat damage.
The truth about technology: No blow-dryer technology prevents frizz if the technique is wrong. An ionic dryer with no attachment and high heat will produce more frizz than a basic dryer with a concentrator nozzle and medium heat. Buy a dryer with a concentrator nozzle and a cool shot button. The technology is less important than the technique.
Frequently Asked Questions
Should I air dry or blow-dry to prevent frizz?
Air drying causes less cuticle damage than blow-drying, but it can cause more frizz in humid conditions because the hair dries slowly and the cuticle is open for a longer period. The best approach is to towel dry gently, let the hair air dry to 70 percent, and then blow-dry with a concentrator nozzle on low heat to close the cuticle. This combines the benefits of both methods.
Can I blow-dry my hair every day without damage?
Yes, if you use a heat protectant, keep the temperature below 160 degrees Fahrenheit, and use a concentrator nozzle. Daily blow-drying causes minimal cuticle damage when done correctly. The damage comes from high temperature and no technique, not from the blow-dryer itself.
Why does my hair look frizzier after blow-drying in the summer?
Summer humidity causes frizz because water vapor in the air interacts with the hydrogen bonds in the hair. Blow-drying opens the cuticle. The open cuticle absorbs moisture from the air. The hair swells. The cuticle lifts. The result is frizz. The fix is to close the cuticle with a cool shot and a silicone-based serum after blow-drying. The serum creates a barrier that prevents moisture from entering the hair.
Does Towel drying cause frizz?
Rubbing the hair with a towel causes friction that lifts the cuticle. Squeezing the hair with a towel is better. The best towel for hair is a microfiber towel or a cotton T-shirt. These materials are smoother than a terry cloth towel and cause less friction. Pat the hair dry instead of rubbing.
Blow-dryers make hair frizzier when the attachment is missing, the temperature is too high, or the drying direction is wrong. Use a concentrator nozzle, keep the temperature below 140 degrees Fahrenheit, and dry from root to tip. The hair comes out smoother, shinier, and less damaged. The technology in the dryer matters less than the technique in your hand. The best blow-dryer is the one you use correctly.